This blog post deals with Flow Builder in Shopware 6 in terms of its practical usage. It presents Flow Builder as a means of attaining well-structured workflows that are clean, properly encapsulated from the rest of the system, and easy to work with.
Creating a VIP tier for frequent customers
Our scenario deals with creating a VIP tier for frequent customers. The goal in detail is to:
- create a “VIP” customer group,
- set up an email template that we’ll send to our customers to inform them about their new tier,
- create a new rule for this group targeting customers with order quantity greater than x orders,
- create a new “Priority” tag for orders completed by our “VIP” customers,
- consolidate all of these actions to create a consistent flow.
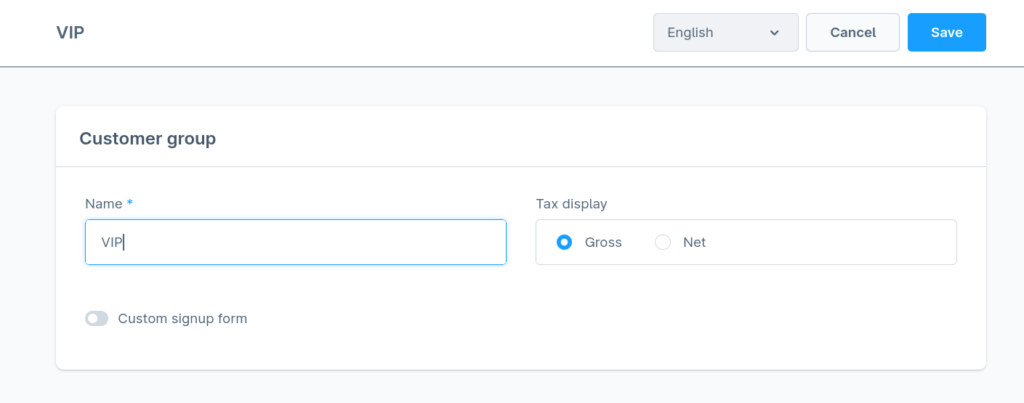
Creating a new customer group
Setting up new customer groups in Shopware is very easy. Go to Settings > Customer groups and then “Add new customer group”. Let’s name our group “VIP”. The name doesn’t matter – you could name it “Expert tier” or anything you want. As long as the name is informative, you’re good to go.
Setting up an email template
This post doesn’t describe how to configure the mailer. Refer to the official documentation or consult your developer team.
Go to Settings > Email templates and search for the “Customer Group Registration Accepted” template. Let’s take a look at what this template gives us.
The interesting part of setting up email templates is that in the editor area, you can use variables (contained within “{{ }}”) that will be replaced by real data when the email is sent to the customer. The default template contains the following:
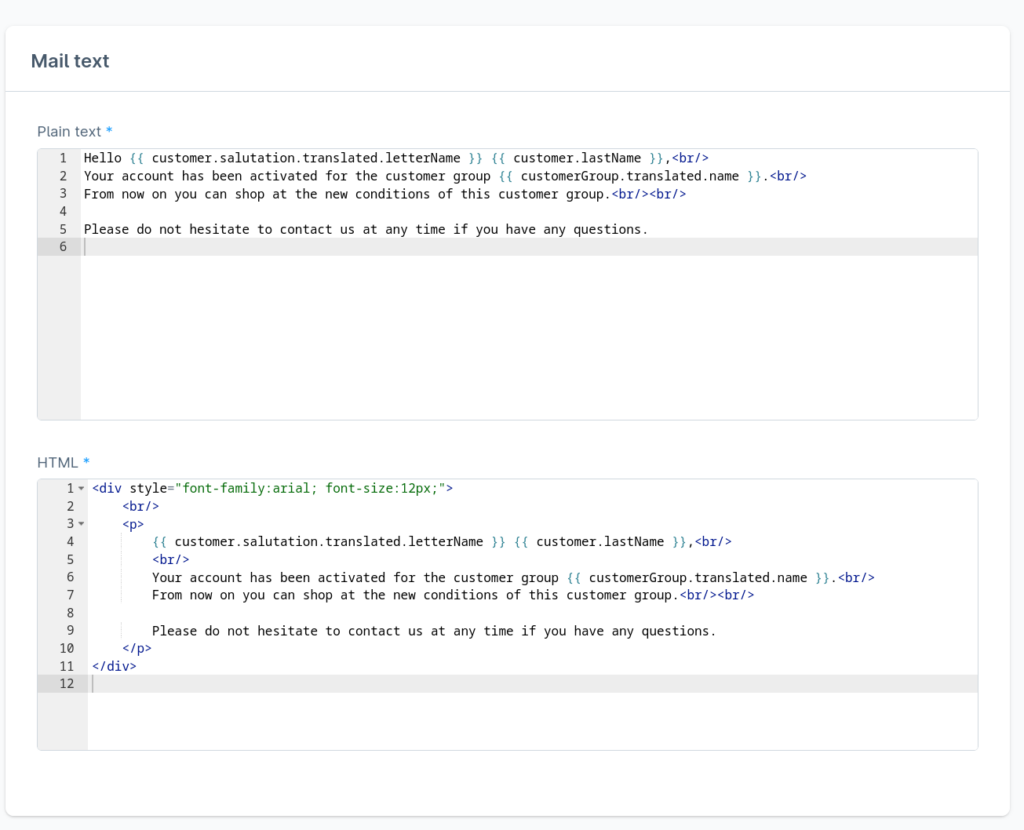
You can see that it takes translated values of different fields pertaining to the customer. These variables have technical names that can be looked up in the official documentation. This is looking good but we’re going to change it up a bit. Go back to the “Email templates” page and click “Duplicate” on this template. Then, in the description field add “Upgrade to the VIP tier”. This is going to help us choose the right template later on.
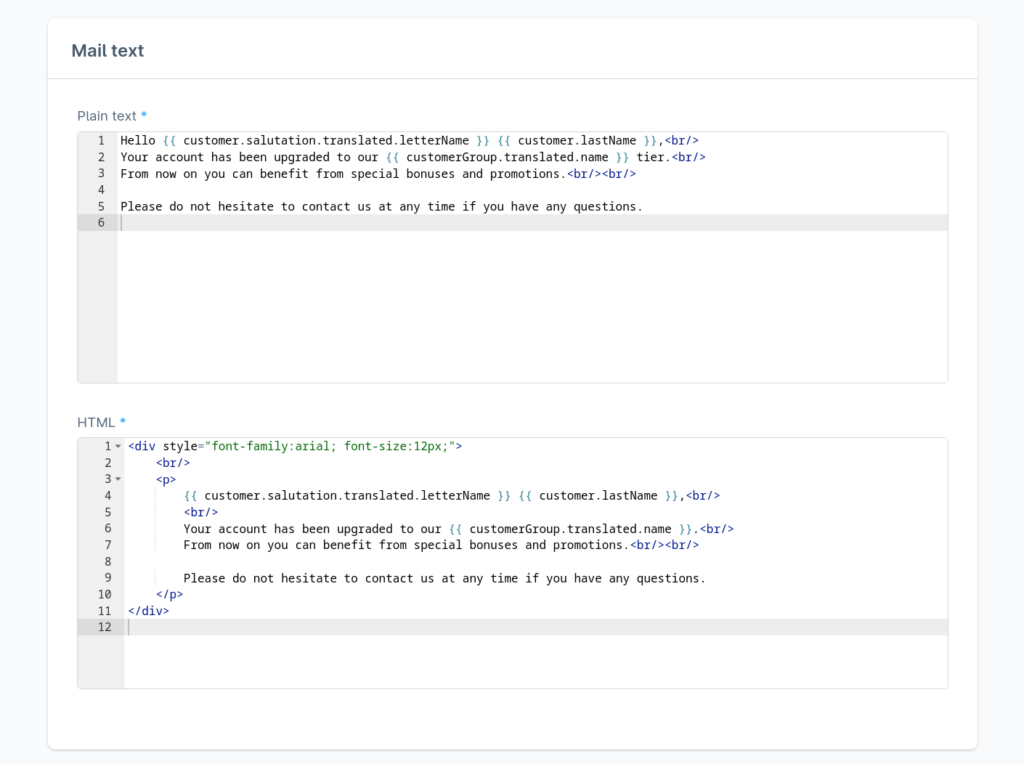
We left the group name as a variable, in case we’d want to change the tier name in the admin panel without confusing the customer.
Creating a rule for the tier
Under Settings > Rule Builder, create a new rule. You can set its name to “Customer eligible for the VIP tier”. The priority may be 100.
Under “Condition” we want to have a setup similar to this. In a real scenario, you may want to add other conditions and change the number of orders that the customer has to complete before they’re eligible. For now, let’s keep 25 as the target number of orders.
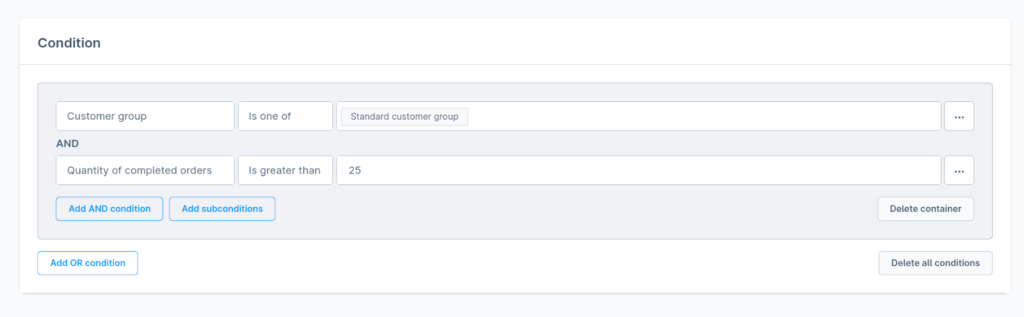
Now, simply save the rule.
Adding a new tag
We still have one thing we need to do before creating the flow for our feature. We’re going to assign tags to priority orders so that they can be processed first, before any other orders – a person or a group of people responsible for handling them will be able to see the tag on the order page. Go to Settings > Tags and click on “Add tag”.
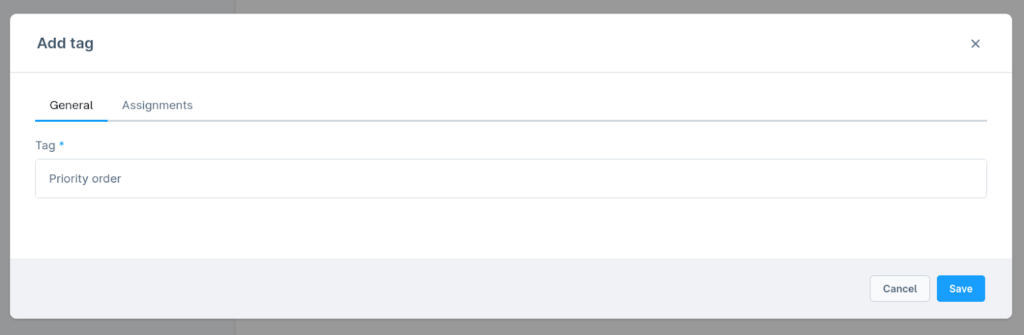
The “General” tab only asks us for the tag name. The assignment tab lets us add the tag granularly to different entities – products, media, categories – including customers: all separately. But we want to automate this process, so we’re not going to use it at all. Now, save the newly created tag.
Adding a flow
At this point, we’ve created everything we need to proceed with setting up the flow for our VIP customers. Adding a new flow requires a few steps. Go to Settings > Flow Builder and then click on “Add flow”. Add a name and remember to check the “Active” switch.

The flow tab is where things are getting interesting. First, we need to select a trigger. A trigger is stating when an action or a set of actions should be run. For the sake of our example, we want to enable the flow when the transaction has been paid. Thus, the following trigger has to be chosen from the trigger list: “State enter / Order transaction / State / Paid”. Now, we need to add a condition. This binds our trigger and circumstances in which we want the flow to be, for the lack of a better word, triggered. For us, the condition is the rule we created earlier. For now, the scheme looks like this:
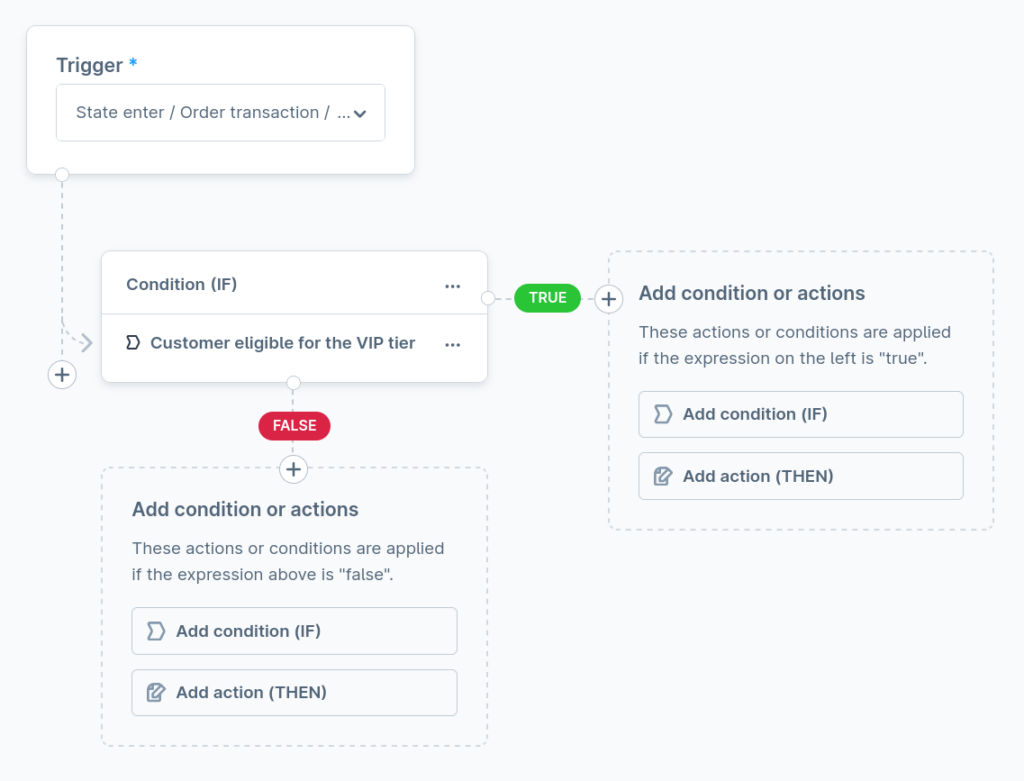
If the customer is, in fact, eligible – we want to update their group and notify them. Otherwise, well, we have no “else” so we won’t add anything to the “False” branch. In the “Add conditions or actions” box, click on “Add action”. Select “Assign customer group” from the action dropdown. It’s in the “Customers” section. Select “VIP” and then click on “Add action”. So far, so good. Now, from “General” select “Send email”. There, choose the template we created: “Upgrade to the VIP tier” – you use the search functionality in the dropdown. Lastly, we want to tag the order as high-priority so that it can be processed quicker by the staff. Under “Tags” select the “Add tag” action and select “Priority”. Save the action. The final flow looks like this:
Don’t forget to save it, however, Shopware will remind you about unsaved changes.
Summary – where do I go from here?
The example given above is just the tip of the iceberg. Flow Builder bundled with Rule Builder gives you endless possibilities when it comes to creating custom solutions for you and your customers. The feature could be extended by containing things like:
- more than one tier: creating a progression (e.g. Standard, Advanced, VIP),
- tier-based promotions,
- alerting external services about customer tier changes via the webhook actions (available in paid Shopware plans).