What’s the PHPStorm built-in REST Client?
The JetBrains company has included a convenient REST client in their products for developers, to fetch and test data from internal and external services. They’ve also provided a JavaScript-based scripting language that speeds up request and response processing directly in the client. The client can also track recent responses and show git-like diffs, which comes in handy during debugging. This article aims to skim through the basics of the client. For more information, you can navigate through the official JetBrains documentation.
How can it benefit me?
Recall that Shopware is an API-first platform. Almost every resource is searchable and discoverable upon request. It doesn’t matter whether you use the Admin API or the Storefront API.
Day-to-day tasks often include inspecting the API by hand to get JSON responses from Shopware core while developing applications but also to reinforce good practices and making sure that the interfaces that you provide can be consumed by third parties in a predictable manner.
Of course, there are other tools to do the same thing but the client provided by JetBrains offers seamless integration with the rest of the IDE and, most importantly, with the codebase you develop and maintain.
Using the client
You can easily find the client under Tools > HTTP Client > Create Request in HTTP Client. You’ll be greeted with something that more or less resembles an ordinary file but don’t be fooled – this is a very capable piece of raw canvas.
A sample request data with placeholders will be shown. It follows a strict format imposed by JetBrains which you can look up in the official documentation. The example contains request data as it would look in plaintext, however, it’s a fully interactive bespoke Swiss army knife.

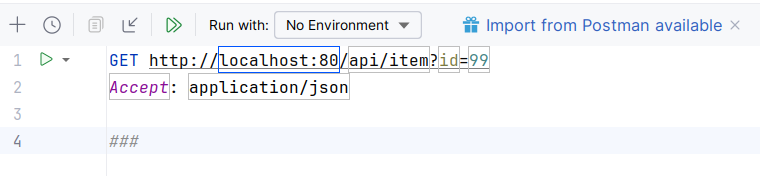
In this article, we’ll focus on just how the client can be used in terms of Shopware API but it’s impossible to explain things intelligibly without discussing the basics of its usage. In the screenshot above you can see the following elements:
- two green buttons: one in the gutter and one in the small toolbox above it. The one in the gutter starts a specific request right and the other one starts all requests within the file,
- the “Run with” element specifies which environment to use. We’ll talk about environments later in the article,
- three hash characters are request separators.
Later we’ll also take a look at what we can do with rudimentary scripting. When you accidentally close the file, you can find it in the file explorer under “Scratches and Consoles”.
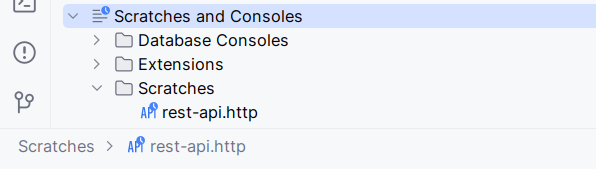
Yes – PHPStorm and other JetBrains IDE derivatives treat the REST client’s files as scratches. You can export them and give them to your colleague when they utter the well-known phrase: “It works on my machine”.
Integrations
The time has come to connect the knowledge we’ve gained so far and put it to use by actually making requests to Shopware via integration keys. If you’ve already created an integration in Shopware and still have access to the credentials, you can skip the following steps.
In order to authenticate with the Shopware API, you need to create an integration which is a pair of a client key and secret to be used in a standard OAuth flow. In the admin panel, under Settings > System > Integrations, click the “Add integration” button. You’ll see a popup that looks like this:
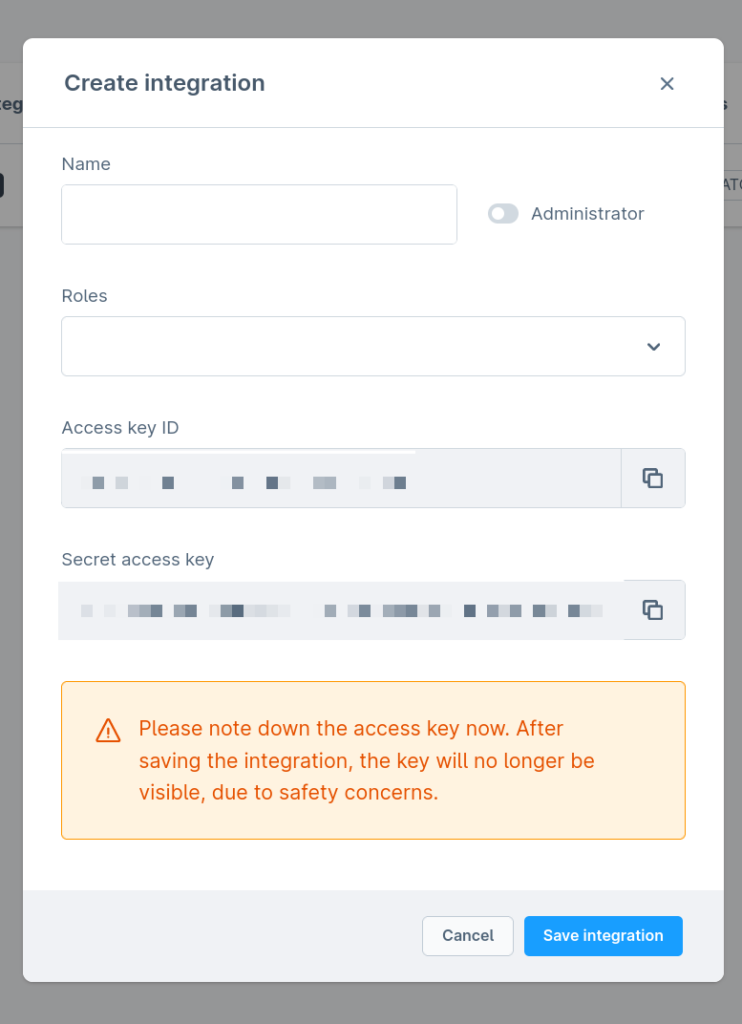
You can name it whatever you want but for testing purposes check the “Administration” checkbox. Save the credentials somewhere (the popup below warns you about the same thing). Of course, you may create as many integrations as you wish. You can remove or edit them but editing an integration won’t let you recreate the keys.
Environments
The REST client also supports environments, where you can save your credentials or other data. For example: one for the dev environment, stage, and production.
Authentication
The HTTP client has a means of automating the usage OAuth 2.0 authorization. This can tremendously reduce debugging time when combined with environments.
By far, the most common way of authentication in Shopware 6 is using the client credentials we generated above. Here, we will quickly go over the most basic configuration you need to get up and running without delving into too many details. All in all, this short guide should give you enough information to communicate with the Shopware API.
In PHPStorm, in the scratch that we created – we don’t have any environments yet.
Click “No environment” and select both options for configuration – public and private. We need both. In the private configuration file you need fill in the credentials variables:
{
 "dev": {
   "clientId": "XXX",
   "clientSecret": "XXX"
 }
}
And that’s it for this part. Now, the public configuration contains much more information:
{
 "dev": {
   "Security": {
     "Auth": {
       "tokenUrl": "http://localhost:8080/api/oauth/token",
       "shopware-demo-local": {
         "Type": "OAuth2",
         "Grant Type": "Client Credentials",
         "Client credentials": "in body",
         "Client ID": "{{clientId}}",
         "Client Secret": "{{clientSecret}}",
         "Token URL": "http://localhost:8080/api/oauth/token"
       }
     }
   }
 }
}
The essential parts here are: “tokenUrl” and “Token URL”: these need to be the same, and contain the proper URL. For Shopware, the part after the host and port is always “/api/oauth/token”, no matter what Shopware 6 version you’re using (as always, the most recent version, the better 😉). Instead of “shopware-demo-local” you can use any key, this is just an example. Values for “Client ID” and “Client Secret” come from our private configuration file. This concludes the configuration part. The next step, of course, is to use it in the wild.
Fetching an entity via the Admin API
Armed with our tools, we can make a request with the client and get the result we’ve been waiting for.
GET http://localhost:8080/api/product/XXX
Authorization: Bearer {{$auth.token("shopware-demo-local")}}
Accept: application/json
Content-Type: application/json
If you used the key “shopware-demo-local” in the configuration above, you can leave it as it is. Otherwise, adjust it. Make sure the URL after “GET” is correct – both the host and the trailing data. Now, you can that for “Bearer” the client only needs to invoke the “token” method from the global object “$auth”. And that’s it – the client will also refresh the token when needed!
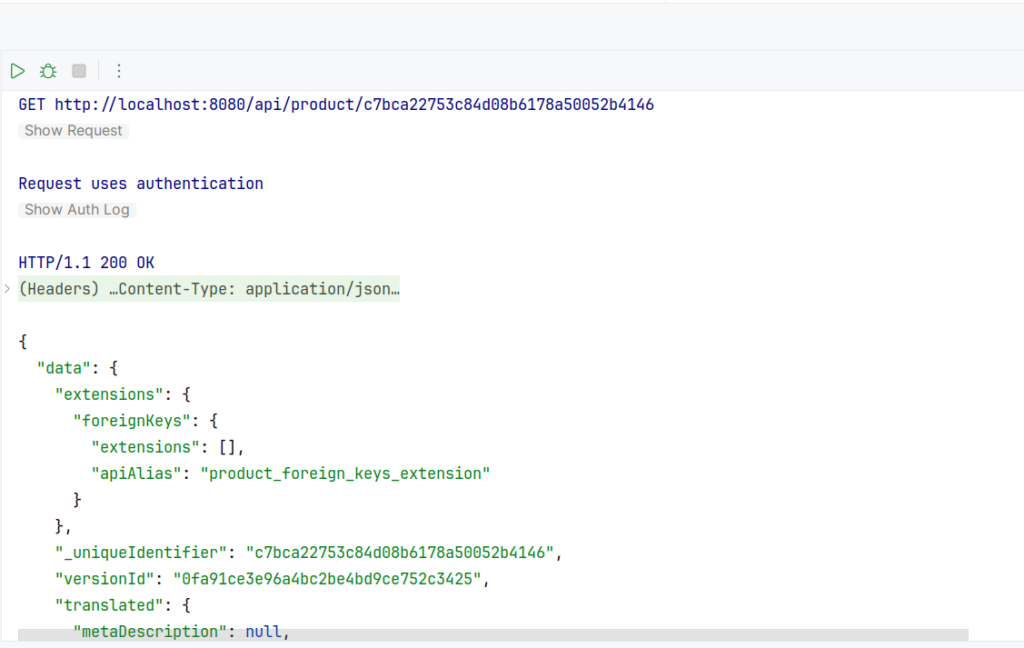
After the request has been performed, response data will be displayed and formatted in a pane that pops up from below.
Also, in the client request editor (your scratch file), a history entry is added:

Every time you perform a request, such an entry will be automatically added to the request file. You can perform other kinds of requests by changing the HTTP verb and adding a payload. As usual, you must include the Content-Type header. The request signature must be then separated from the body by one newline character.
Summary
The REST client in PHPStorm can prove very useful when developing Shopware plugins and applications – both the Admin API but also the Storefront API.
This article showed how to create an integration in Shopware, how to input authentication data in the REST client, and how to perform some rudimentary requests. It also showed the basics of request histories. I hope that with this short guide, you’ll convert to the built-in client from using other tools – which I believe are also capable of many things, there’s no denying that.