Docker Desktop application provides the possibility to run a clear instance of Shopware shop locally, without having to worry about an additional configuration like connection to a database or to a mail catcher. The images may be downloaded from dockware.io website.
This dockware.io is a powerful tool for Shopware developers, which effortlessly launch and manage the Shopware environment. It is a perfect option for testing, as well as development and integration. If you want to run the project in this way, please check the description below.
Dockware.io – explanation
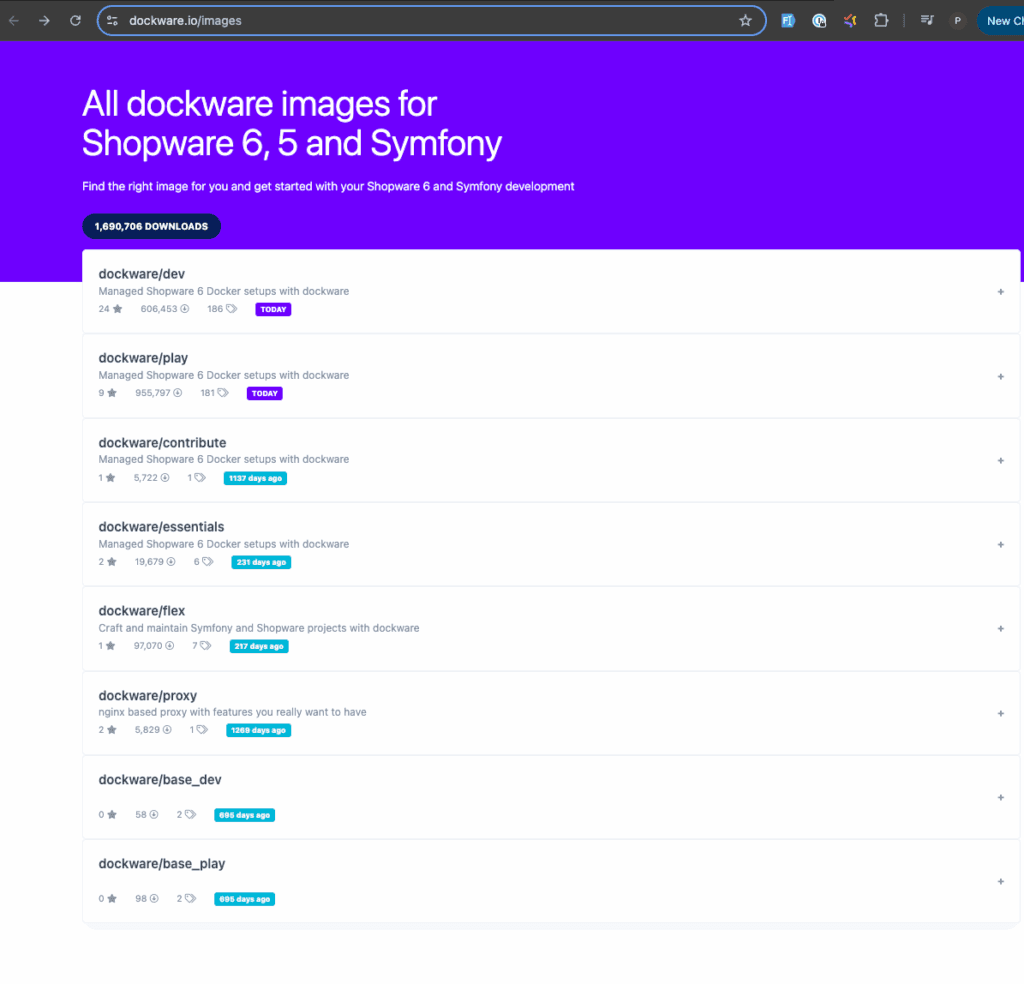
On the page https://dockware.io/images you can find all dockware images which are available for Shopware 5 and 6:
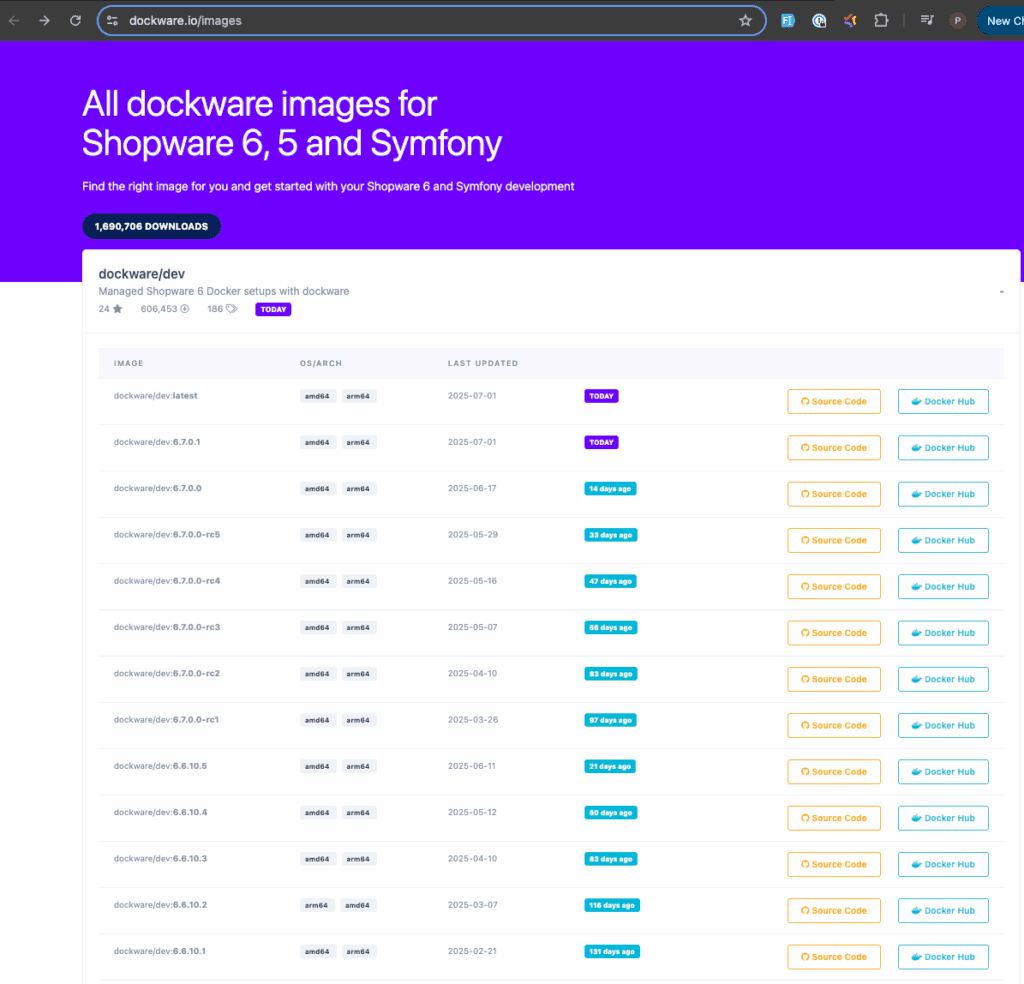
As you can see there is a possibility to get different types of Shopware images. For this purpose “dockware/dev” type is used (version 6.7.0.1):
How to run a Shopware project locally
- Download and install Docker Desktop App.
- Create a new folder for your project and open it.
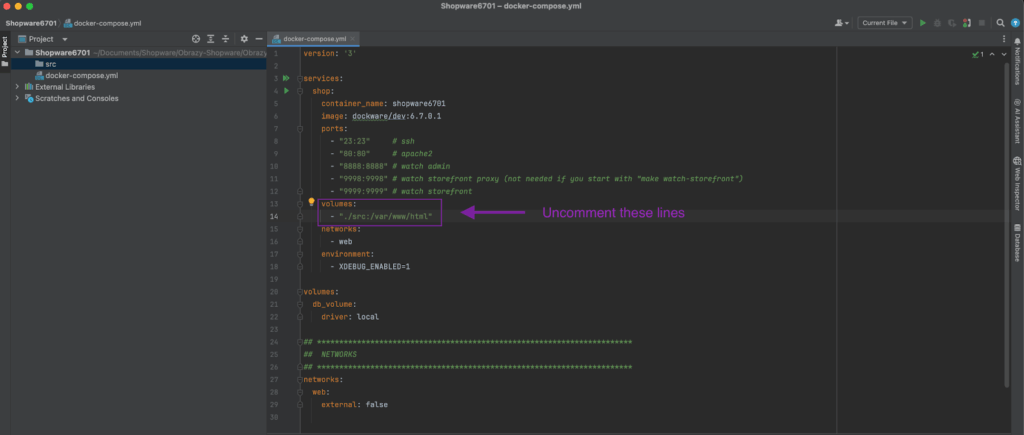
- Add docker-compose.yaml file in this folder. The docker file is presented below:
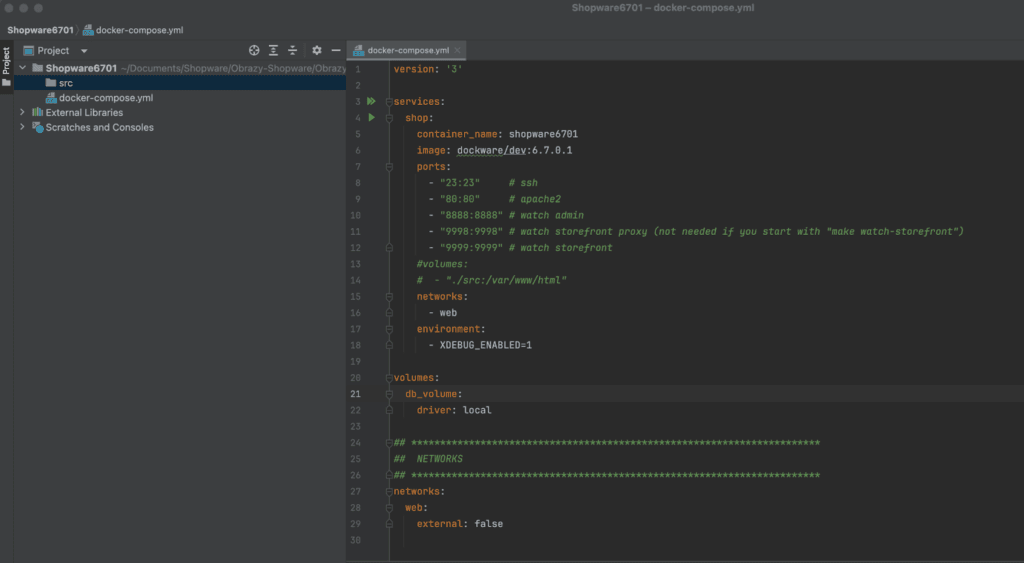
- An additional explanation:
- line 5 – “container_name” – add any name to the container, e.g. “shopware6701”
- line 6 – choose the proper version of the image to use (in our case it is “dockware/dev:6.7.0.1”)
- lines: 13 and 15 – for the first docker run, “volumes” must be commented. It will be used later to bind docker and local files. If these files will be uncommented, bind-mounting will lead to an empty folder, without Shopware files.
- Create an empty folder “src” inside the root directory.
- Open Docker Desktop App.
- Inside the root folder run docker for the first time via terminal:
- docker compose up -d
- 💡Hint! Be sure that the Docker Desktop App is open. After running the command, the shop will be pulled and you will be able to see that the container is active:

- Copy the source code of the Shopware shop to the “src” folder, by using a docker copy command:
docker cp containerName:/var/www/html/. ./src
# in our case it is: docker cp shopware6701:/var/www/html/. ./src - The next step is to connect local and docker files by bind-mounting. To do this:
- Uncomment lines 13 and 14
- Then:
- recreate the docker project by using the command:
docker compose up -d - run bind-mounting:
#Mac:
docker exec -it containerName bash -c ‘sudo chown www-data:www-data /var/www/html -R’
# in our case:
docker exec -it shopware6701 bash -c ‘sudo chown www-data:www-data /var/www/html -R’
#Linux:
# change basic permissions (you may need sudo)
chgrp -R 33 ./src
# write permissions for cache/log folder
chmod a+w ./src/var/*
sudo chown www-data:www-data /var/www/html -R
- recreate the docker project by using the command:
Credentials for the local project
Default credentials for Shopware 6
- Storefront:
- Administration:
- URL: http://localhost/admin#/login
- user: admin
- password: shopware
- Database (via adminer):
- URL: http://localhost/adminer.php
- server: 127.0.0.1
- user: root
- password: root
- database name: shopware
- Mail catcher:
- Logs:
Default credentials for Shopware 5
- Storefront:
- URL: http://localhost/
- Administration
- URL: http://localhost/backend
- user: demo
- password: demo
- Database (via adminer):
- URL: http://localhost/adminer.php
- server: 127.0.0.1
- user: root
- password: root
- database name: shopware
- Mail catcher:
- Logs:
How to start working with the Shopware instance
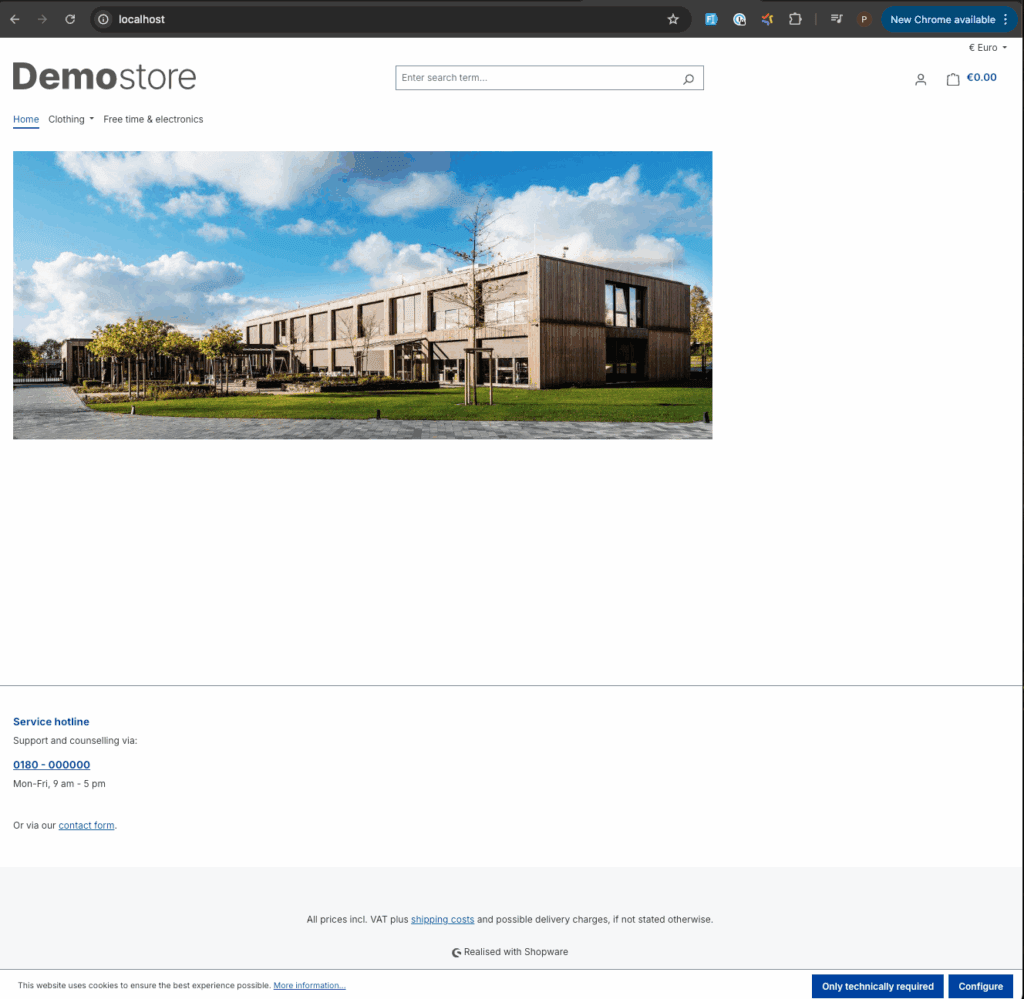
When you open http://localhost/ you will see a storefront page with the demo data:
The administration page is visible via link (for Shopware 6): http://localhost/admin#/login. When you write default credentials you will see:

Important commands
To run important commands you need to first login to the docker container, by command:
docker exec -it containerName bash
#in our case:
docker exec -it shopware6701 bash
Shopware requires some commands to build all javascript files, to see changes on the website, which should be done in the docker container:
- Changes in the administration:
bin/build-administration.sh - Changes in the storefront
bin/build-storefront.sh - Changes in storefront and administration in the same time:
bin/build-js.sh - Changes in theme plugin:
bin/console theme:compile - Clearing the cache (necessary quite often):
bin/console cache:clear
“On the fly” changes
Storefront
With the dockware.io images you are able to easily work with instant changes, without running the commands described above. If you want to do changes in the storefront part you just need to run command (in the docker container):
bin/watch-storefront.sh
In this case, you should then visit the page http://localhost:9998 and from now, every change will be immediately visible. Nevertheless, when you want to see changes in normal view later, you need to build everything, to see the changes.
⚠️Important! If you use watch-storefront mode, changing variants on product detail pages may not work. Nevertheless, it’s a known bug. When you come back to the default mode, variants will work once again.
Administration
The administration part may also use the “on the fly” mode (http://localhost:8888), just type the following commands:
- cd .. # we need to go to the parent folder of “html” in the docker container
- make watch-admin
⚠️Important! It is technically possible to run a command in the same way as for storefront (in the html folder):
bin/watch-administration.sh
Nevertheless, it may generate errors or may not work so we do not recommend this option. As a plot twist… do not use “make watch-storefront” in the parent folder (as we do it similarly for the administration), because it may generate errors when you quit from the watch and try to work in the default mode.
How to stop working with the project instance
Stop a container
If you want to stop working with the project you have two commands which stop the container. The first one is:
docker compose stop
After this command, the container will stop and all data which were added or modified will be still available during the next run.
Remove a container
The second command:
docker compose down
also stops the container but also removes all changed data, e. g. if you have any additional plugins installed, they will be uninstalled after the next run. In this case it is necessary to configure everything once again. In some cases this option may be very useful, but this command must be used with caution.
Summary
After all these steps, presented in this document, it is possible to create or add plugins to the default plugin folder:
“src/custom/plugins”
All data available in the “src” folder are connected to the docker and it is possible to work with the clear instance of the Shopware shop. All the data visible in the folder “src” are now connected to the docker data, which means that if you modify any file there, the changes will be transferred to the docker environment and visible on the page.